1.What Is Auto-darkening Welding Helmet?
2. What Are the Components of Auto-darkening Welding Helmet
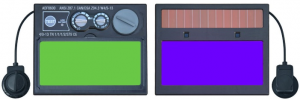
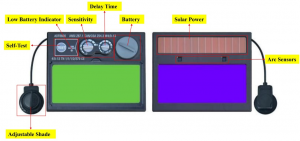
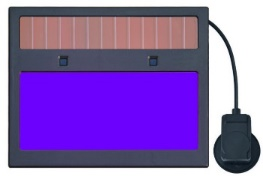
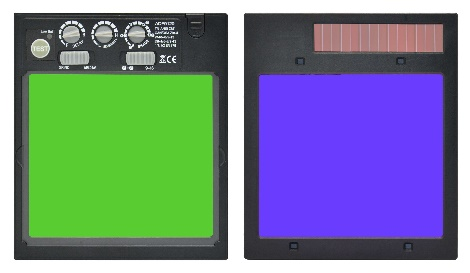
3. What Are the Components of Auto-darkening Welding Lens?
4. How to Use Auto-darkening Welding Helmet?
5. How Does the Auto-darkening Welding Helmet Work?
8. How are the Welding Helmets powered?
9. Traditional Welding Helmet VS Auto-darkening Welding Helmet
11. Traditional Auto-darkening Welding Lens V.S. True Color Auto-darkening Welding Lens
12. The Means of Optical Class 1/1/1/1
13. How to Choose a Good Auto-darkening Welding Helmet?
14. Why can’t the auto-darkening welding darken when exposed to a cell phone flashlight or sunlight?
1.What Is Auto-darkening Welding Helmet?
Auto-darkening welding helmet is personal protective equipment (PPE) that protect your eyes and face under welding situation.
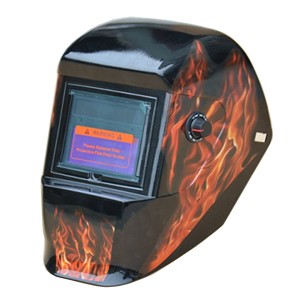
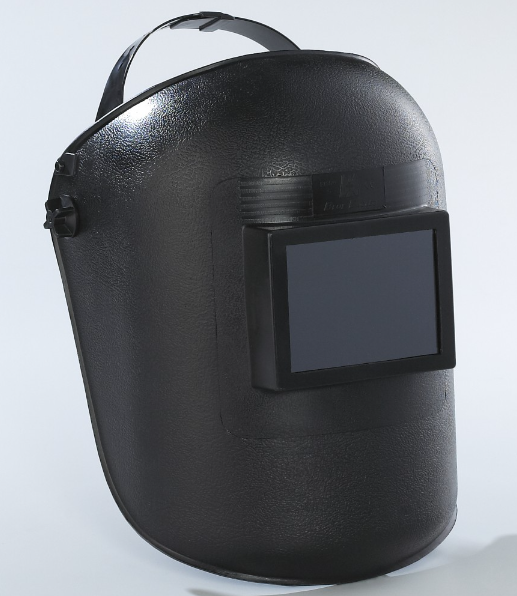
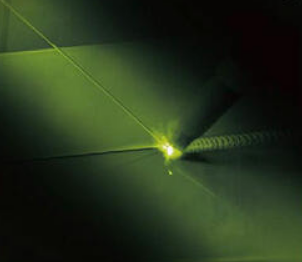
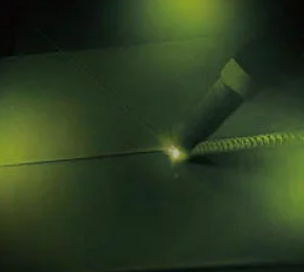
A Typical Auto-darkening Welding Helmet
An auto-darkening welding helmet is a helmet worn by welders to protect the face and eyes from the intense light emitted during welding. Unlike traditional welding helmets with fixed dark lenses, the lenses of auto-dimming helmets automatically adjust their darkness according to the light intensity. When the welder is not welding, the lens remains clear, providing clear visibility of the surrounding environment. However, when a welding arc occurs, the lenses darken almost immediately, protecting the welder's eyes from the glare. This automatic adjustment eliminates the need for the welder to constantly lift and lower the helmet, increasing efficiency and reducing eye strain. And "auto-darkening welding helmets" include all welding masks that automatically respond to the welding arc light during the welding process with auto-darkening welding goggles that automatically darken with an LCD display. When welding is stopped, the welder can view the welded object through the auto-darkening welding filter. Once the welding arc is generated, the helmet vision is dimmed, thus preventing damage from strong rays.
2. What Are the Components of Auto-darkening Welding Helmet
1). Welding Mask (PP & Nylon Material)
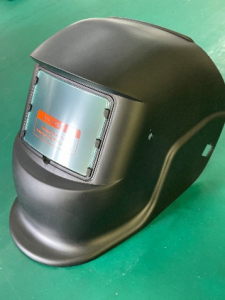
2). External & Internal Protective Lens (Clear Lens, PC)
3). Welding Lens
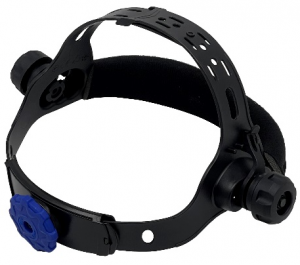
4). Headgear (PP & Nylon Material)
3. What Are the Components of Auto-darkening Welding Lens?
4. How to Use Auto-darkening Welding Helmet?
1). To use an auto-darkening welding helmet, follow these steps:
a. Inspect Your Helmet: Before using your helmet, check the lenses, headband, or other parts for damage or cracks. Make sure all parts are working properly.
b. Adjustable Helmet: Most auto-dimming helmets come with an adjustable head strap to provide a comfortable fit. Adjust the headgear by loosening or tightening the straps until the helmet fits securely and comfortably on your head.
c. Test the Helmet: Put the helmet on your head and make sure you can see clearly through the lenses. If the lenses are not clear or the helmet position is incorrect, make the necessary adjustments.
d. Setting the Darkness Level: Depending on the model of auto-dimming helmet, there may be a knob or digital controller to adjust the darkness level. Refer to the manufacturer's instructions for the recommended level of shading for the type of welding you are doing. Set the darkness level accordingly.
e. To Test the Auto-dimming Function: In a well-lit area, put on the helmet and hold it in the welding position. Make sure the footage is clear. The arc is then created by striking the electrode or pressing the trigger on the welder. The shot should darken almost instantly to the set darkness level. If the lenses don't darken or take a long time to darken, the helmet may need new batteries or other troubleshooting.
f. Welding Operation: After testing the auto-darkening function, the welding operation can be continued. Keep the helmet in welding position throughout the process. The lenses automatically darken to protect your eyes as you traverse the arc. When you're done welding, the lens returns to clarity allowing you to see the work area.
Remember to follow proper welding safety procedures, such as wearing proper protective clothing, using proper welding techniques, and ensuring proper ventilation in the work area.
2). Things to note and check before use
a. Please check that the surface of the mask is free of cracks and that the lenses are intact, if not, please stop using it.
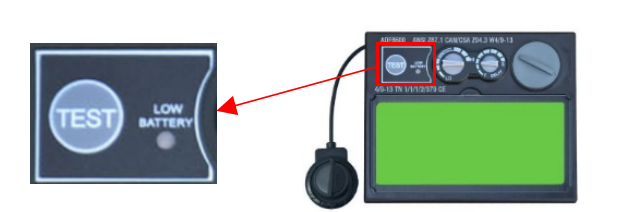
b. Please use the self-test function to check if the lens is working properly, if not, please stop using it.
c. Please check that the low battery display is not blinking red, if not, please change the battery.
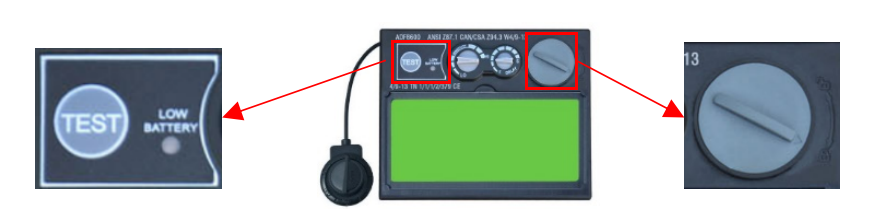
d. Please check that the arc sensors are not covered.
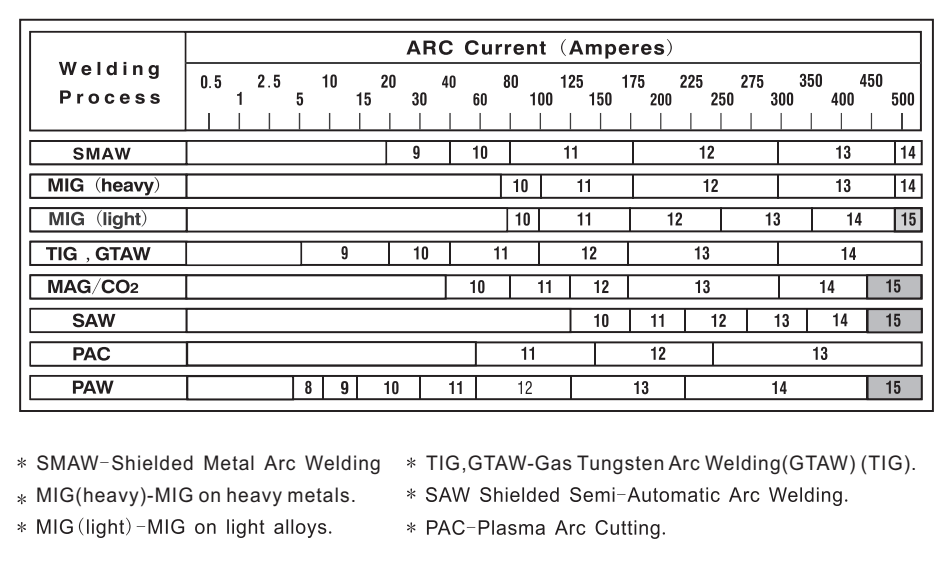
e. Please adjust the fit shade according to the welding type and current you are going to use according to the following table.
f. Please adjust a fit sensitivity and delay time.
g. After checking, if the headgear is already attached to the mask, you can put on the mask directly and adjust the headgear according to your situation. If the headgear is not attached to the mask, please follow the video below to attach the headgear before putting on the mask.
5. How Does the Auto-darkening Welding Helmet Work?
1). When you are welding, the mask can protect your face, and once the arc sensors grab the welding arc, welding lens will darken very fast to protect your face.
2). Here's how it works:
a. Arc sensors: The helmet is equipped with arc sensors, typically placed on the external surface of the helmet. These sensors detect the intensity of light that reaches them.
b. UV/IR filter: Before the light sensors, there is a special UV/IR filter that blocks harmful ultraviolet (UV) and infrared (IR) rays emitted during welding. This filter ensures that only safe levels of light reach the sensors.
c. Control unit: The light sensors are connected to a control unit located inside the helmet. This control unit processes the information received from the sensors and determines the appropriate darkness level.
d. Liquid crystal display (LCD): In front of the eyes, there is a liquid crystal display that serves as the lens of the helmet. The control unit adjusts the darkness level of the LCD based on the intensity of light detected by the sensors.
e. Adjustable darkness level: The welder can usually adjust the darkness level of the LCD display according to their preference or the specific welding task. This can be done through a knob, digital controls, or other adjustment mechanisms.
f. Darkening and Clearing: When the sensors detect a high-intensity light, indicating welding or an arc being struck, the control unit triggers the LCD to darken immediately to the preset darkness level. This protects the welder's eyes from the intense light.
g. Switching Time: The speed at which the LCD darkens is known as the switching time, and it is usually measured in milliseconds. High-quality auto-darkening helmets have faster arc detection times, ensuring the welder's eyes are well-protected.
h. Clear Time: When the welding stops or the light intensity decreases below the threshold set by the sensors, the control unit instructs the LCD to clear or return to its light state. This allows the welder to see clearly and assess the weld quality and overall work environment without removing the helmet.
By continuously monitoring the light intensity and adjusting the LCD display accordingly, auto-darkening welding helmets provide convenient and effective eye protection for welders. They eliminate the need for repeatedly flipping up a traditional welding helmet, improving productivity, safety, and comfort during welding operations.
6. How to Adjust Sensitivity?
1). Adjust the sensitivity of your welding mask, you will usually need to refer to the manufacturer's instructions, as different helmets may adjust slightly differently. However, here are some general steps you can follow:
a. Locating the Sensitivity Adjustment Knob: Depending on the make and model of welding mask, the sensitivity adjustment knob can be located on the outside or inside of the helmet. It's usually labeled "sensitivity" or "sensitivity."
b. Identify your Current Sensitivity Level: Look for any indicators, such as numbers or symbols, on your helmet that represent your current sensitivity setting. This will give you a reference point for adjustments.
c. Assess the Environment: Consider the type of welding you will be doing and the surrounding conditions. Lower sensitivity levels may be required if the welding environment contains a lot of light or sparks. Conversely, if the environment is relatively dark or there is little splash, a higher sensitivity level may be appropriate.
d. Make Adjustments: Use the sensitivity adjustment knob to increase or decrease the sensitivity level. Some helmets may have a dial that you can turn, while others have buttons or digital controls. Follow the specific instructions for your helmet for adjustments.
e. Test Sensitivity: Put on the helmet and do a practice or test weld to make sure the sensitivity is adjusted correctly. Watch how the helmet reacts to the welding arc and assess whether it is dark enough to protect your eyes. If not, adjust further until the desired sensitivity is achieved.
Remember that it is critical to consult the manufacturer's instructions for your particular welding cap model, as they may provide additional guidance and specific recommendations for adjusting sensitivity. Always put safety first and protect your eyes effectively by using the appropriate sensitivity level for your welding task and environment.
2). The situation of adjusting to the highest:
a. When you are welding under a darker environment
b. When you are welding under low current welding
c. When you are using TIG welding
3). The situation of adjusting to the Lowest:
a. When you are welding under a lighter environment
b. When you are welding with your partner together
7. How to Adjust Delay Time?
1). Adjusting the delay time on a welding helmet is slightly different than adjusting the sensitivity. Here are general guidelines on how to adjust delay times:
a. Locate the Delay Adjustment Knob: Look for knobs or controls on welding helmets that are specifically labeled "delay" or "delay time." It's usually located next to other adjustment controls, such as sensitivity and darkness level.
b. Identify the Current Delay Time Setting: Check for an indicator, number or symbol representing the current delay time setting. This will give you a reference point for adjustments.
c. Determine Delay Time Required: The delay time determines how long the lens remains dark after the welding arc stops. You may need to adjust the delay based on personal preference, the welding process you are performing, or the specifics of the task.
d. Adjust Delay Time: Use the Delay Adjustment Knob to increase or decrease the delay time. Depending on your welding helmet, you may need to turn a dial, press a button, or a digital control interface. Please refer to the instruction manual of the helmet for the specific method of adjusting the delay time.
e. Test Delay Time: Put on the helmet and do a test weld. Observe how long the lens stays dark after the arc stops. If the delay is too short, consider increasing the delay to ensure your eyes are protected before the lens switches back to a brighter state. Conversely, if the delay is too long and affecting productivity, reduce the delay to minimize downtime between welds. Fine-tune the delay time: If the initial adjustment does not meet your requirements, make further adjustments to achieve the desired delay time. It may take some trial and error to find the best settings that provide adequate eye protection without hindering your workflow.
Remember to consult the manufacturer's instructions for your particular welding helmet model, as they may provide additional guidance and specific recommendations for adjusting the delay time. Following proper safety practices and using an appropriate delay time will help protect your eyes during welding operations.
2). The higher the current you use, the longer the delay time should be adjusted to avoid damage to our eyes from undispersed heat radiation.
3). When you are using spot welding, you need to adjust the delay time to slowest
8. How are the Welding Helmets powered?
Lithium Battery + Solor Power
9. Traditional Welding Helmet VS Auto-darkening Welding Helmet
1). The development of welding helmet
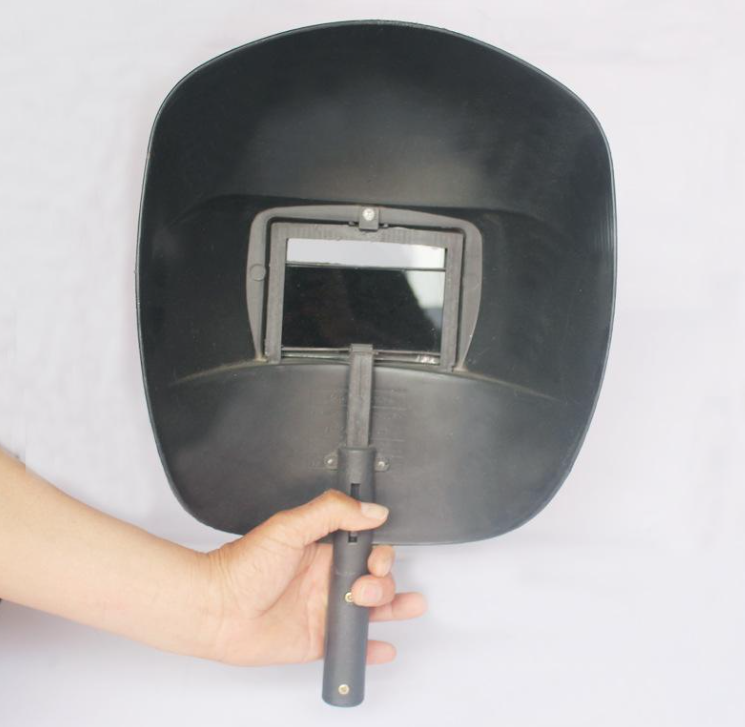
a. Handheld Welding Helmet+Black Glass (Fixed Shade)

b. Head-mounted Welding Helmet+Black Glass (Fixed Shade)
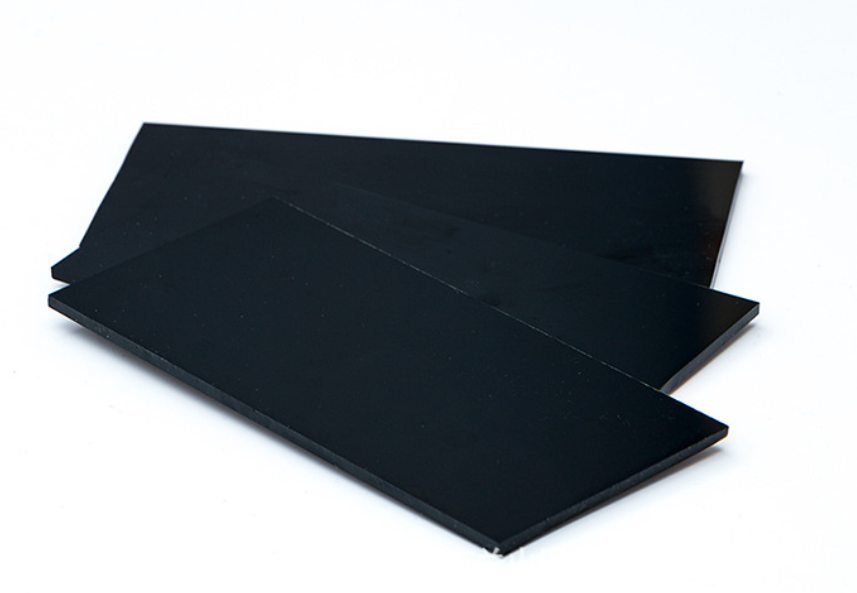
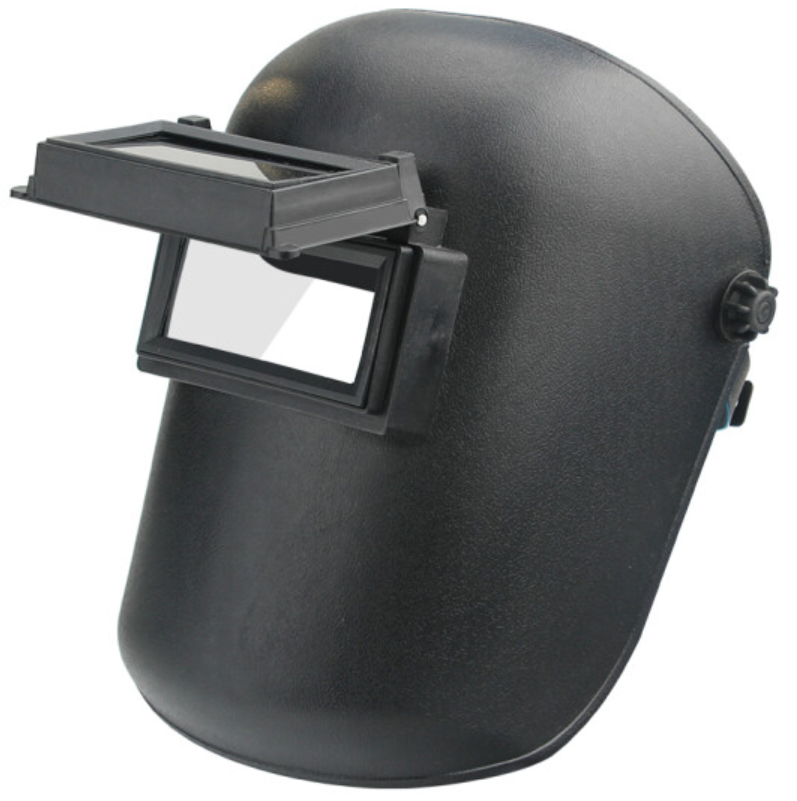
c. Flip-up Head-mounted Welding Helmet+Black Glass (Fixed Shade)

d. Auto-darkening Welding Helmet + Auto-darkening Welding Lens (Fixed Shade/Variable Shade9-13 & 5-8/9-13)
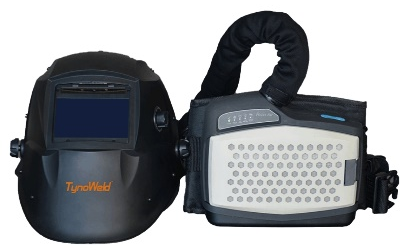
e. Auto-darkening Welding Helmet with Respirator+ Auto-darkening Welding Lens (Fixed Shade/Variable Shade9-13 & 5-8/9-13)
2). Traditional Welding Helmet:
a. Functionality: Traditional welding helmets use a fixed tinted lens that provides a constant shade level, typically a shade 10 or 11. These helmets require the welder to manually flip the helmet down over their face before starting the welding process. Once the helmet is down, the welder can see through the lens, but it remains at a fixed shade level regardless of the brightness of the welding arc.
b. Protection: Traditional welding helmets offer adequate protection against UV and IR radiation, as well as sparks, debris, and other physical hazards. However, the fixed shade level can make it challenging to see the workpiece or surrounding environment when not actively welding.
c. Cost: Traditional welding helmets tend to be more affordable compared to auto-darkening helmets. They typically do not require any batteries or advanced electronic components, resulting in a lower purchase price.
3). Auto-darkening Welding Helmet:
a. Functionality: Auto-darkening welding helmets feature a variable shade lens that automatically adjusts its tint level in response to the brightness of the welding arc. These helmets usually have a light state shade of 3 or 4, allowing the welder to see clearly when not welding. When the arc is struck, sensors detect the intense light and darken the lens to a specified shade level (typically within a range of shades 9 to 13). This feature eliminates the need for the welder to constantly flip the helmet up and down, improving comfort and efficiency.
b. Protection: Auto-darkening welding helmets provide the same level of protection against UV and IR radiation, sparks, debris, and other physical hazards as traditional helmets. The ability to vary the shade level automatically ensures optimal visibility and protection throughout the welding process.
c. Cost: Auto-darkening welding helmets are generally more expensive due to the advanced technology they incorporate. The electronic components, sensors, and adjustable lens add to the overall cost. However, the improved comfort and efficiency offered by auto-darkening helmets can offset the initial investment in the long run.
In summary, auto-darkening welding helmets provide greater convenience, improved visibility, and potentially better work efficiency compared to traditional welding helmets. However, they also come at a higher cost. The choice between the two ultimately depends on the welder's specific needs, preferences, and budget.
4) Advantage of Auto-darkening Welding Helmet
a. Convenience: Auto-darkening welding helmets feature a built-in filter that automatically adjusts the shade according to the welding arc. This eliminates the need for welders to constantly flip their helmet up and down to check their work or adjust the shade manually. It allows for a more seamless and efficient workflow.
b. Enhanced Safety: Auto-darkening helmets provide continuous protection against harmful ultraviolet (UV) and infrared (IR) radiation emitted during welding. The instant darkening feature ensures that welders' eyes are shielded from the intense light as soon as the arc is struck. This reduces the risk of eye injuries, such as arc eye or welder's flash.
c. Clear Visibility: Auto-darkening helmets offer a clear view of the workpiece and the surrounding environment, both before and after the welding arc is initiated. This allows welders to position their electrode or filler metal precisely and make any necessary adjustments without compromising their vision. It improves accuracy and weld quality.
d. Versatility: Auto-darkening helmets often have adjustable settings for shade darkness, sensitivity, and delay time. This makes them suitable for various welding processes, such as shielded metal arc welding (SMAW), gas metal arc welding (GMAW), and gas tungsten arc welding (GTAW). Welders can easily customize these settings to best suit the specific welding application or personal preferences.
e. Comfortable to Wear: Auto-darkening helmets are generally lightweight and designed with ergonomics in mind. They often come with adjustable headgear and padding, allowing welders to find a comfortable and secure fit. This reduces fatigue and strain during long welding sessions.
f. Cost-effective: Although auto-darkening helmets may have a higher initial cost compared to traditional helmets, they offer long-term cost savings. The adjustable settings and instant darkening feature ensure welders have excellent visibility and protection, minimizing the likelihood of rework or mistakes that can be costly.
g. Improved Productivity: The convenience and clear visibility provided by auto-darkening helmets contribute to increased productivity. Welders can work more efficiently, as they do not have to pause and adjust their helmet manually or interrupt their workflow to assess their progress. This can lead to time savings and higher output.
Overall, an auto-darkening welding helmet offers convenience, safety, clear visibility, versatility, comfort, cost-effectiveness, and improved productivity for welders. It is a valuable tool that enhances both the quality of welding work and the overall welding experience.
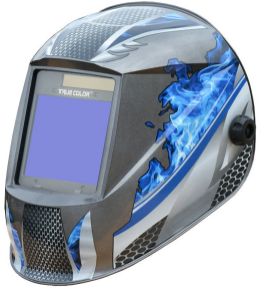
10. What is True Color?
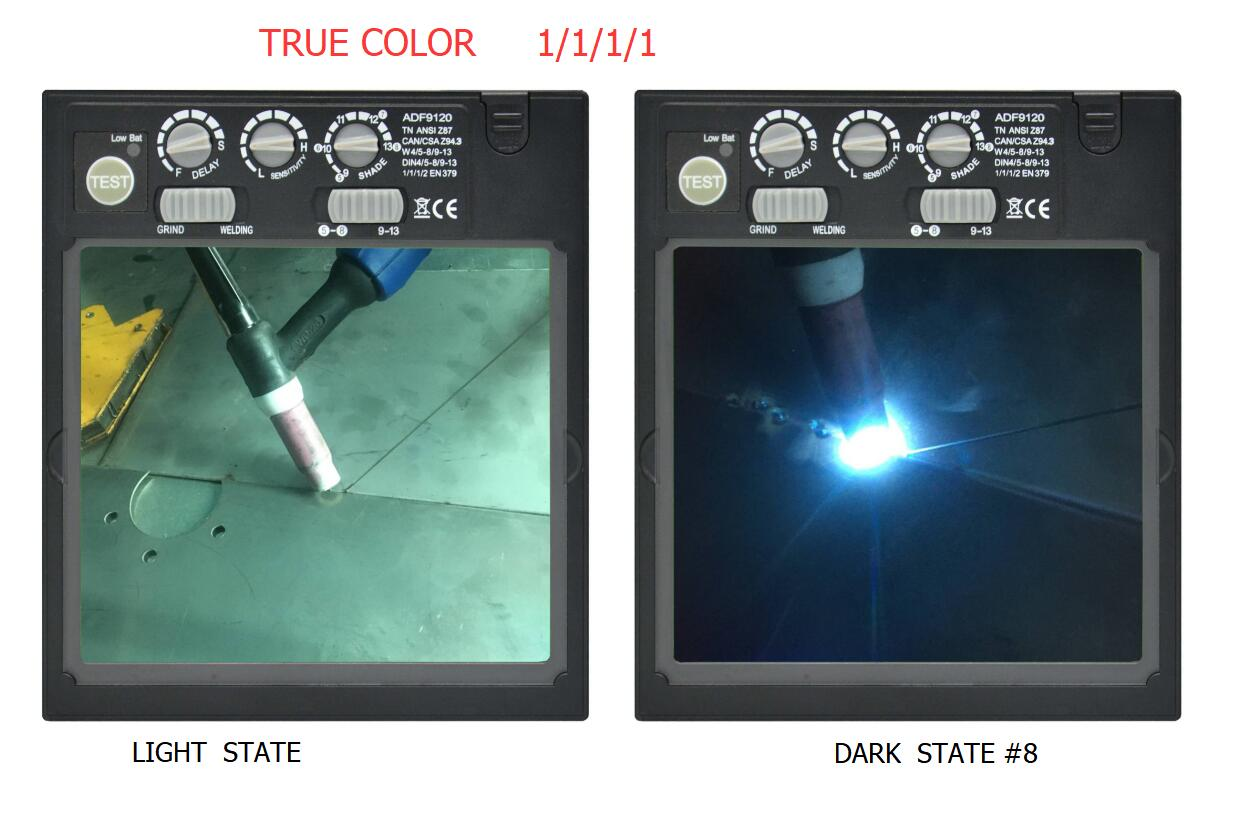
1). True Color refers to a feature found in some types of welding helmets, especially the premium auto-darkening models. True Color technology is designed to provide a truer, more natural perception of color while welding, unlike traditional helmets which often distort colors to make the welding environment appear more washed out or greenish. The welding process often produces intense light and a bright arc, which affects the welder's ability to accurately perceive color. True Color technology utilizes advanced lens filters and sensors to minimize color distortion and maintain a clear view of the workpiece and surrounding environment. This enhanced color clarity is beneficial to welders who require precise color identification, such as when working with specific materials, identifying defects or ensuring an exact match of paint or coatings. Welding helmets with true color technology often provide a more realistic representation of color, similar to what a welder would see without the helmet. Helps improve overall visibility, safety and quality of welding jobs by providing accurate color feedback and reducing eye strain. It's important to note that not all welding helmets have True Color technology, and color accuracy may vary between makes and models.
2). The Tynoweld auto-darkening welding lens with true color technology gives you realistic color before, while and after welding.
11. Traditional Auto-darkening Welding Lens V.S. True Color Auto-darkening Welding Lens
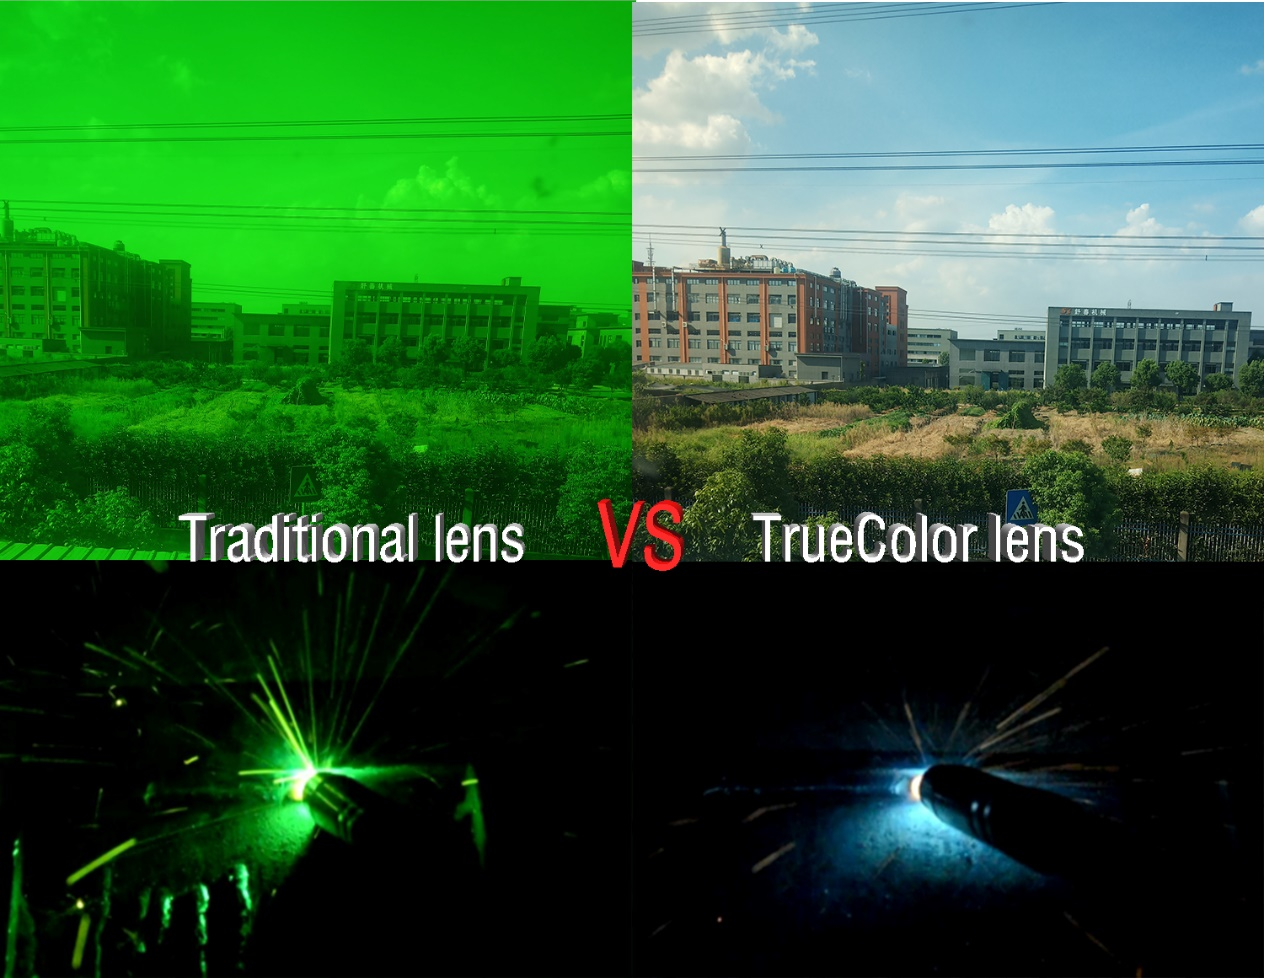
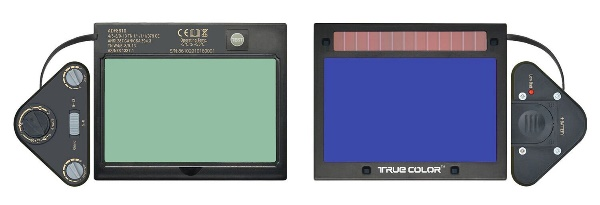
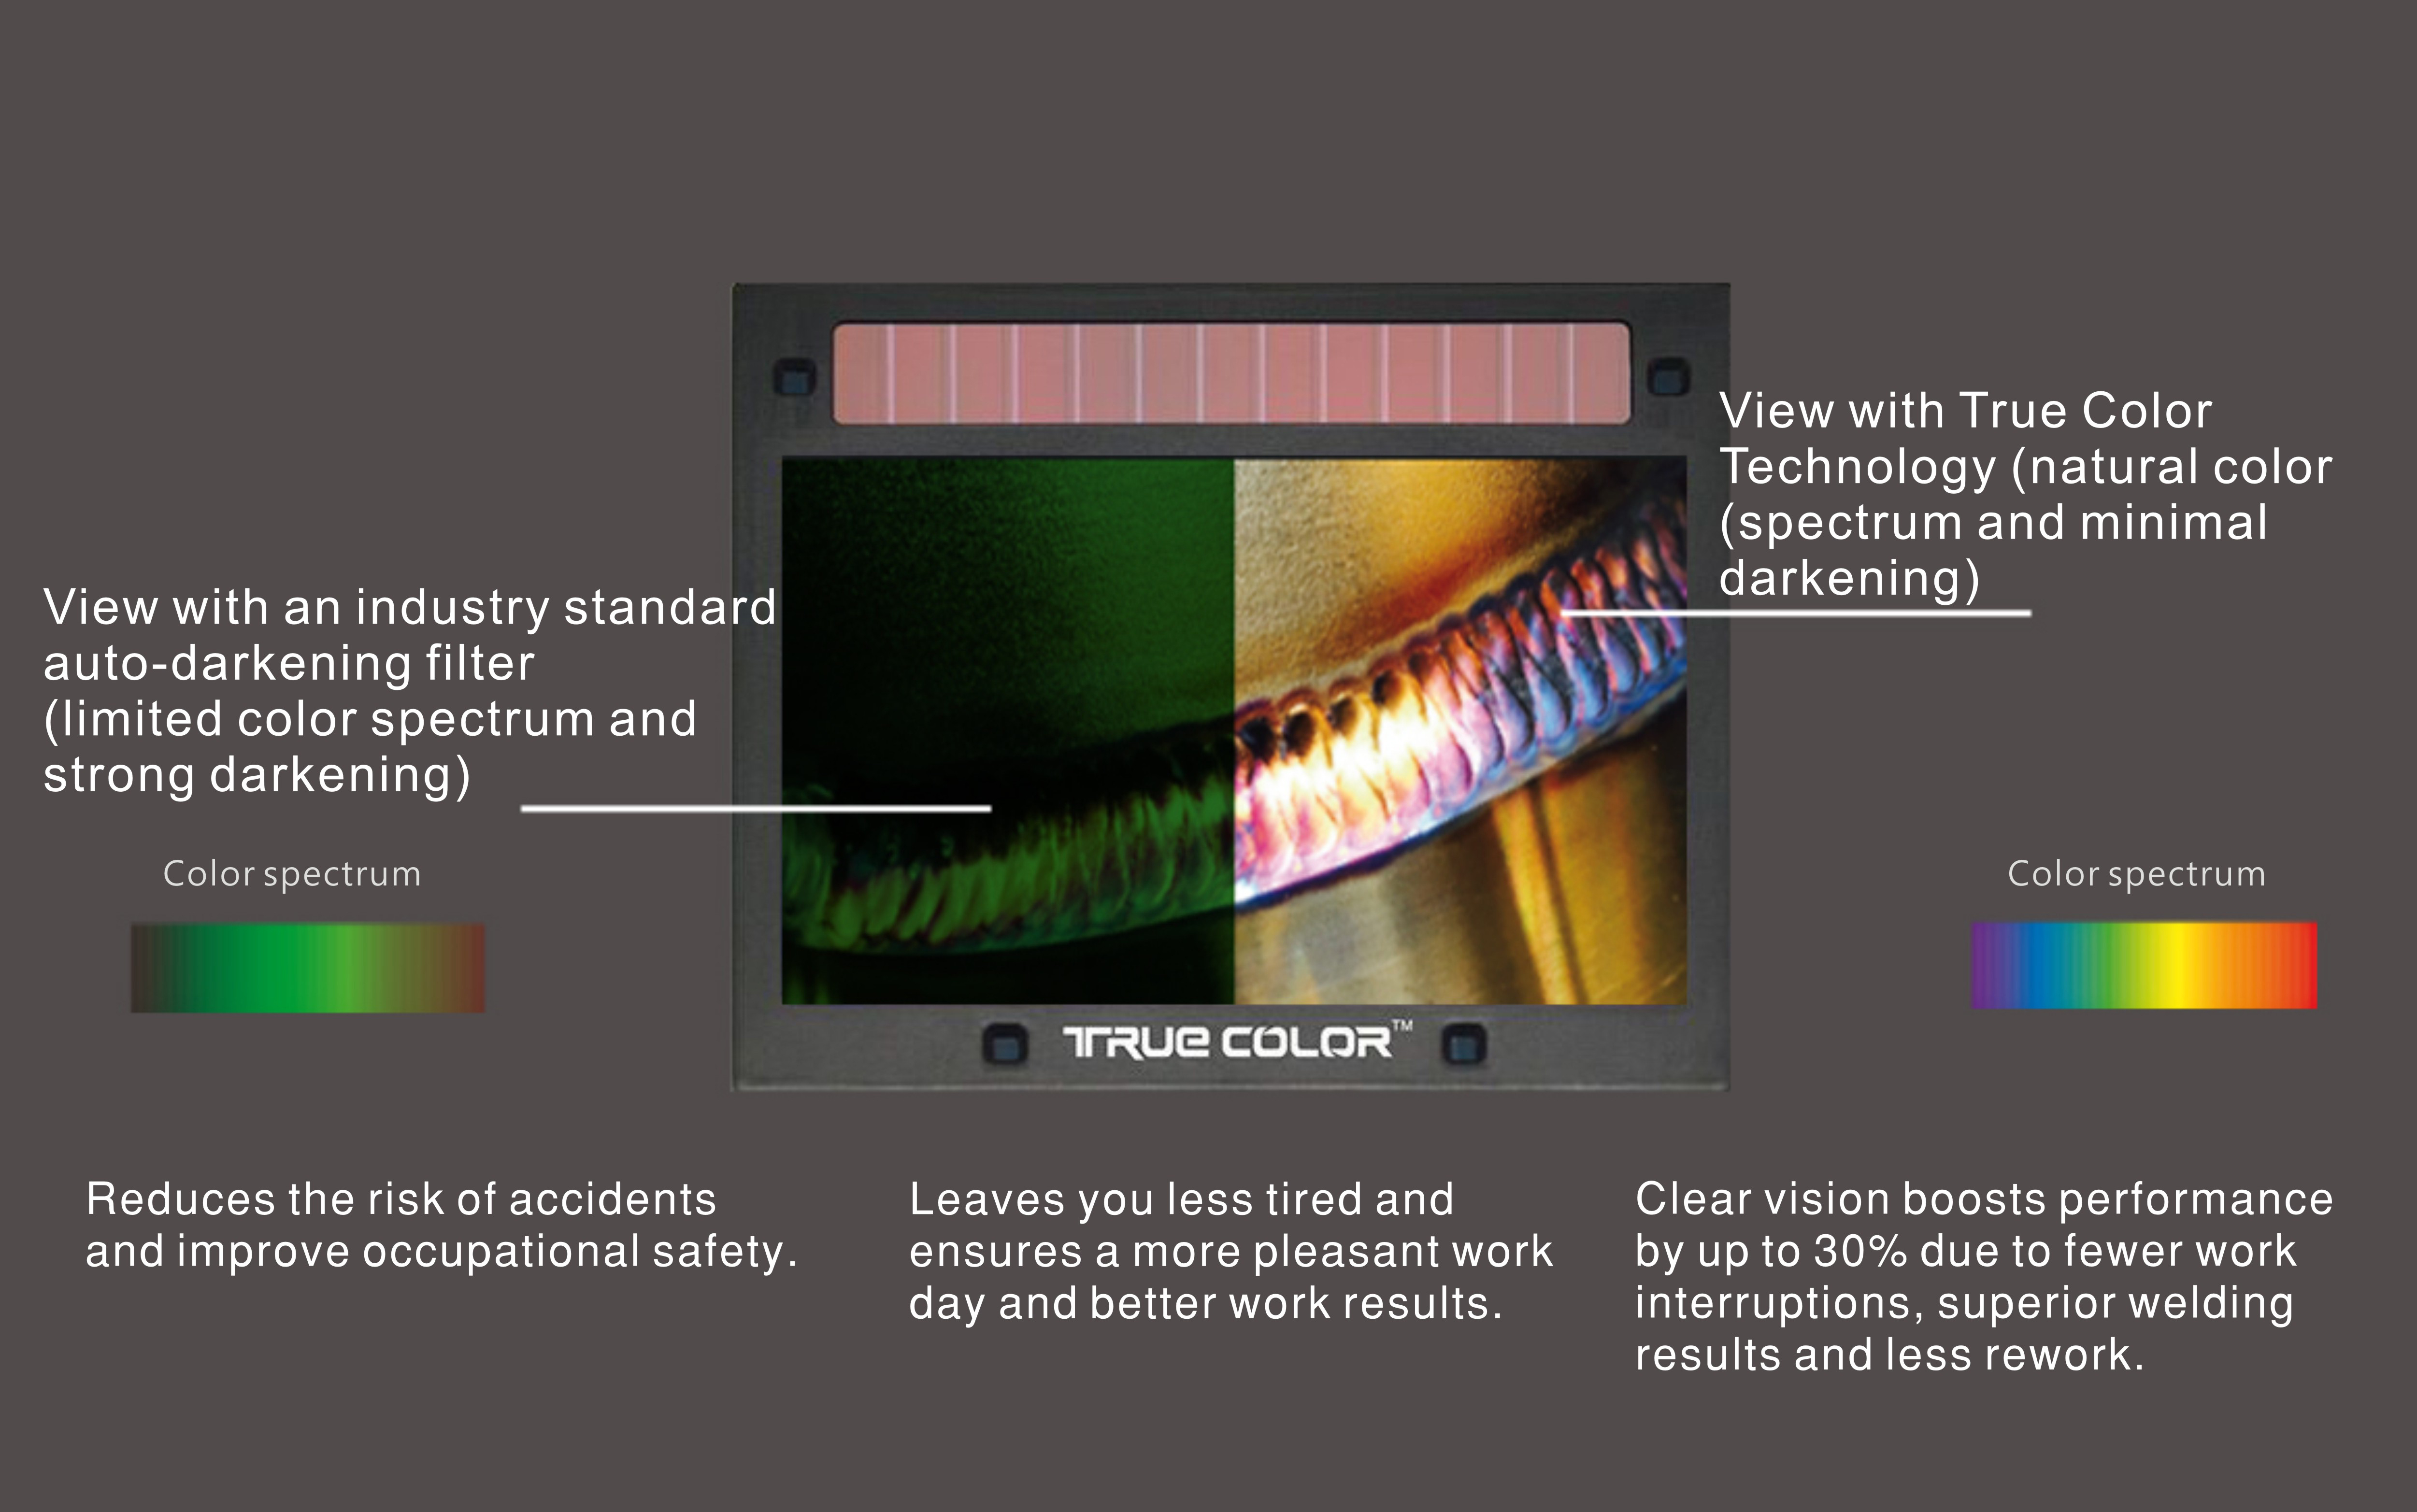
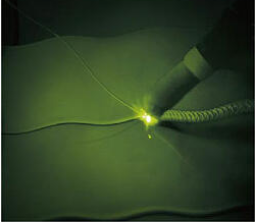
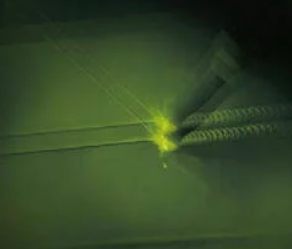
1). Traditional auto-darkening welding lenses transmit a single color, mainly yellow and green., and the view is darker. True color auto-darkening welding lenses transmit a real color including about 7 colors, and the view is lighter and clearer.
2). Traditional auto-darkening welding lenses have a slower switching time (the time from light state to dark state). True color auto-darkening welding lenses have a faster switching time (0.2ms-1ms).
3). Traditional Auto-Darkening Welding Lens:
a. Basic Visibility: Traditional auto-darkening welding lenses provide a darkened shade when the arc is struck, protecting the welder's eyes from the intense light. However, these lenses typically have a limited capability to provide a clear and natural view of the welding environment.
b. Color Distortion: Traditional lenses often distort colors, making it challenging to accurately identify different materials and their properties. This can impact the welder's ability to make informed decisions during the welding process.
c. Eye Strain: Due to the limited visibility and color distortion, prolonged usage of traditional auto-darkening lenses can lead to eye strain and fatigue, reducing the welder's comfort and efficiency.
d. Safety Limitations: Although traditional lenses provide protection against harmful UV and IR radiation, the distortion and limited visibility may make it harder for welders to detect potential hazards, resulting in compromised safety.
e. Weld Quality: The limited visibility and color distortion of traditional lenses may make it more difficult for welders to achieve precise bead placement and control heat input, potentially affecting the overall quality of welds.
4). True Color Auto-Darkening Welding Lens:
a. Enhanced Visibility: True Color technology provides a more realistic and natural view of the welding environment, allowing welders to see their work more clearly. This improves the precision and productivity of the welding process.
b. Accurate Color Perception: True Color lenses offer a clearer and more accurate representation of colors, enabling welders to make better-informed decisions during welding processes. This includes identifying different materials and their properties, ensuring welds meet specific standards or requirements.
c. Reduced Eye Strain: The more natural and accurate colors provided by True Color lenses help reduce eye strain and fatigue during long welding sessions. This contributes to increased comfort and overall welding efficiency.
d. Improved Safety: Clearer vision and accurate color recognition provided by True Color lenses enhance safety in welding operations. Welders can better detect potential hazards and ensure proper quality control.
e. Better Weld Quality: True Color auto-darkening lenses allow welders to see the welding arc and workpiece in true color, resulting in precise bead placement, better control of heat input, and overall higher weld quality.
f. Versatility: True Color lenses are beneficial for welders who frequently need to match colors or work with specific materials. The accurate color perception allows for effective color matching and meets specific requirements.
g. Improved Workflow: With the ability to see the workpiece clearly and accurately, welders can work more efficiently. They can quickly identify defects or imperfections in the weld and make necessary adjustments without repeatedly removing the helmet.
When comparing traditional auto-darkening welding lenses with true-color auto-darkening welding lenses, the latter provide enhanced visibility, accurate color perception, reduced eye strain, improved safety, better weld quality, versatility, and improved workflow.
12. The Means of Optical Class 1/1/1/1
To qualify for a EN379 rating, the auto-darkening lens get tested and rated in 4 categories: Optical class, Diffusion of light class, Variations in luminous transmittance class, and Angle dependence on luminous transmittance class. Each category is rated on a scale of 1 to 3, with 1 being the best (perfect) and 3 the worst.
a. Optical class (accuracy of vision) 3/X/X/X
You know how distorted something can look through water? That's what this class is all about. It rates the level of distortion when looking through the welding helmet lens, with 3 being like looking through rippled water, and 1 being next to zero distortion - practically perfect
b. Diffusion of light class X/3/X/X
When you're looking through a lens for hours at a time, the tiniest scratch or chip can have a big impact. This class rates the lens for any manufacturing imperfections. Any top rated helmet can be expected to have a rating of 1, meaning it is free of impurities and exceptionally clear.
c. Variations in luminous transmittance class (light or dark areas within the lens) X/X/3/X
Auto-darkening helmets typically offer shade adjustments between #4 - #13, with #9 being the minimum for welding. This class rates the consistency of shade across different points of the lens. Basically, you want the shade to have a consistent level from top to bottom, left to right. A level 1 will deliver an even shade throughout the entire lens, where a 2 or 3 will have variations at different points on the lens, potentially leaving some areas too bright or too dark.
d. Angle dependence on luminous transmittance X/X/X/3
This class rates the lens for its ability to provide a consistent level of shade when viewed at an angle (because we don't just weld stuff that's directly in front of us). So, this rating is particularly important for anyone welding those hard to reach areas. It tests for a clear view without stretching, dark areas, blurriness, or issues with viewing objects at an angle. A 1 rating means the shade stays consistent no matter the viewing angle.
13. How to Choose a Good Auto-darkening Welding Helmet?
a. Optical Class: Look for a helmet with a high optical clarity rating, the best is 1/1/1/1. This rating indicates clear visibility with minimal distortion, allowing for precise weld positioning. But normally, but 1/1/1/2 is enough.
b. Variable Shade Range: Opt for a helmet with a wide range of shade levels, typically from #9-#13. This ensures optimal protection for different welding processes and environments.
c. Switching Time: Consider the helmet's reaction time, which refers to how quickly the lens transitions from a lighter state to a darker one. Look for a helmet with a fast reaction time, ideally around 1/25000th of a second, to shield your eyes instantly from the welding arc.
d. Sensitivity Control: Check if the helmet has adjustable sensitivity settings. This feature allows you to fine-tune the helmet's responsiveness to welding arc brightness, ensuring reliable darkening even with low amperage applications.
e. Delay Control: Some helmets offer a delay control setting, which allows you to adjust how long the lens stays dark after the welding arc stops. This can be useful when working with materials that require longer cooling times.
f. Comfort and Fit: Ensure the helmet is comfortable to wear for extended periods. Look for adjustable headgear, padding, and a well-balanced design. Try the helmet on to ensure a secure and comfortable fit.
g. Durability: Look for a helmet made of durable materials that can withstand harsh welding conditions. Check for certifications such as CE certification to ensure the helmet meets safety standards.
h. Size and Weight: Consider the size and weight of the helmet. A lightweight helmet will reduce strain on your neck and shoulders, while a compact design can improve maneuverability in tight spaces.
i. Brand Reputation and Warranty: Research reputable brands known for producing high-quality welding helmets. Look for warranties that cover defects and malfunctions to ensure you are protected against potential issues.
Remember to prioritize your specific welding needs and preferences when choosing an auto-darkening welding helmet. It's also helpful to read reviews and seek recommendations from experienced welders to make an informed decision.
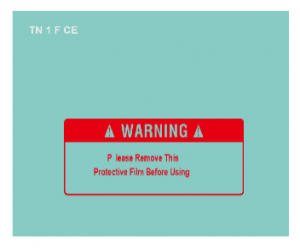
14. Why can’t the auto-darkening welding darken when exposed to a cell phone flashlight or sunlight?
1). Welding arc is a hot light source, the arc sensors can only catch the hot light source to darken the lens.
2). To avoid flash due to the interfere of sunlight, we put one red membrane on the arc sensors.

no red membrane
no red membrane