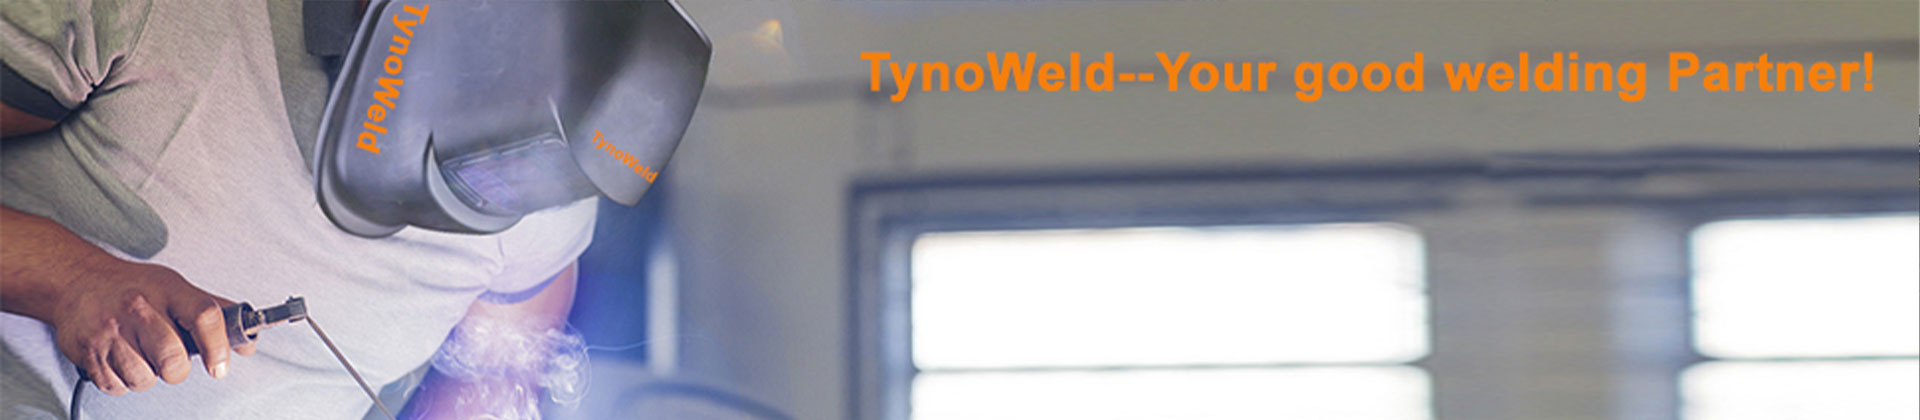

When I select a welding helmet, I prioritize both safety and performance. The right welding helmet protects my eyes from intense light and shields my face from sparks. Over the past decade, the welding helmet industry has introduced innovative options such as the auto welding helmet, welding respirator, and welding goggles. Today, I see welding helmets made from fiberglass, polypropylene, and composite materials. I always look for features like advanced welding filter technology and digital controls. With this variety—including welding respirators and welding goggles—I can easily find a welding helmet that fits my needs and enhances my work quality.
Key Takeaways
- Modern welding helmets protect your eyes and face with advanced features like auto-darkening lenses and strong materials.
- Comfort matters: lightweight helmets with adjustable headgear reduce fatigue and help you work longer safely.
- Choose a helmet that matches your welding type (MIG, TIG, Stick) by selecting the right shade and sensitivity settings.
- Look for helmets certified by safety standards like CE and ANSI and CSA to ensure reliable protection.
- Multiple sensors and fast lens reaction times keep your eyes safe from sudden bright arcs.
- Regular maintenance, including cleaning and replacing worn parts, extends your helmet’s life and keeps it effective.
- Avoid cheap, uncertified helmets; investing in quality gear saves money and protects your health in the long run.
The Evolution of Welding Helmets
Early Protective Gear
Leather masks and basic shields
When I first learned about welding history, I discovered that early welders relied on simple protective gear. Leather masks and basic shields offered minimal protection. Welders often used thick pieces of cloth or leather to cover their faces. These materials blocked sparks but did not protect eyes from intense light. I found that comfort and visibility were not priorities in those days. Welders accepted discomfort as part of the job.
Early welding gear focused on shielding the face from flying debris and heat, but left eyes vulnerable to harmful rays.
First glass lens innovations
As welding technology advanced, inventors introduced glass lenses to improve eye protection. I noticed that these lenses allowed welders to see their work more clearly. Historical records show that eye protection included opaque cloth pieces, thick glass lenses, mesh side shields, and metal earpieces. Flame-resistant clothing often used asbestos or chemically treated fabrics, though durability remained limited.
| Protective Gear Type | Common Early Materials Used |
|---|---|
| Eye Protection | Opaque cloth pieces, thick glass lenses, mesh side shields, metal earpieces |
| Flame-Resistant Clothing | Asbestos, chemically treated fabrics (with limited durability) |
These innovations marked the beginning of safer welding practices. I appreciate how these early steps paved the way for modern welding helmet designs.
The Birth of the Modern Welding Helmet
Introduction of flip-up lenses
The next major leap came with the introduction of flip-up lenses. I find flip-up lenses practical because they let me inspect my work without removing the helmet. This feature improved both safety and efficiency. Welders could switch between shaded and clear views quickly.
Standardization of safety features
Industry leaders soon recognized the need for standardized safety features. I saw regulations emerge to ensure every welding helmet met minimum protection standards. Manufacturers began using stronger materials and consistent lens shades. These changes reduced injuries and set the stage for further innovation.
Technological Advancements
Auto-darkening lens development
In 1981, Hornell International introduced the auto-darkening lens. The lens automatically adjusts to the welding arc, protecting my eyes instantly. I no longer need to flip the lens manually. This advancement increased both safety and productivity. after Hornell’s auto-darkening lens, many other factory also have their auto darkening welding helmets,TynoWeld is one of those factories who can manufacture auto darkening welding helmet.
Improvements in comfort and ergonomics
Modern welding helmet design focuses on comfort and usability. I benefit from lightweight materials and ergonomic headgear. Manufacturers use high-strength composites that resist heat and wear. Fast-response sensors detect light changes within milliseconds, adjusting lens color in real time. High-quality optical lenses improve clarity and reduce fatigue. These features make long welding sessions easier and safer.TynoWeld welding helmet is a good choice as it’s light design and comfortable Nylon headgear as well as it’s TrueColor technology lens.
| Technological Advancement | Description |
|---|---|
| Fast-Response Sensors | Sensors detect light changes within milliseconds and adjust lens color in real time, enhancing safety and clarity. |
| High-Quality Optical Lenses | Lenses improve visual clarity and reduce welder fatigue during use. |
| Ergonomic and Lightweight Design | Helmet designs focus on comfort for extended wear, reducing strain on the user. |
| Durable High-Strength Materials | Helmets are made from materials resistant to wear and high temperatures, ensuring reliability and longevity. |
Today, I can choose a welding helmet or welding respirator that combines advanced protection with comfort. The evolution of these helmets reflects decades of innovation and attention to welder safety.
How History Informs Today’s Welding Helmet Choices
Lessons learned from past safety incidents and industry standards
I have seen how past safety incidents have driven improvements in helmet design. Early accidents often resulted from inadequate protection or poor fit. Over time, the industry responded by developing stricter standards and better materials. I now look for helmets that meet ANSI and EN certifications, knowing these standards reflect lessons learned from real-world incidents.
Manufacturers have also improved helmet suspension systems and impact liners. These changes help prevent injuries from falling objects or side impacts. I trust helmets that show a clear commitment to meeting or exceeding industry standards.
Influence of regulations and evolving safety requirements
Regulations play a major role in shaping helmet features. As safety requirements evolve, manufacturers must adapt their designs. I have noticed that new helmets often include features like auto-darkening lenses and enhanced headgear to comply with updated rules. These changes not only protect me but also make my work more efficient.
Staying informed about current regulations helps me choose helmets that offer the best protection and comfort.
Summary:
History and regulations guide my choices today. By learning from past incidents and following evolving standards, I can select helmets that keep me safe and productive.
Key Safety Features in Modern Welding Helmet and Welding Respirator
Lens Protection and Clarity
Shade levels and UV/IR protection
When I select a welding helmet, I always check the lens shade levels. Proper shade levels protect my eyes from the intense brightness of the welding arc. I rely on helmets that block both ultraviolet (UV) and infrared (IR) radiation. These harmful rays can cause permanent eye damage if I do not use the right protection. Modern helmets offer variable shade settings, so I can adjust the darkness for different welding tasks. This flexibility helps me maintain clear vision while staying safe.
Impact resistance standards (ANSI, CSA)
I trust helmets that meet strict safety standards. The ANSI/ISEA Z87.1 standard in the United States and the CSA Z94.3 standard in Canada set clear requirements for lens protection and clarity. These standards ensure that my helmet resists impacts and shields my eyes from UV and IR radiation. I have summarized the key requirements in the table below:
| Standard | Lens Protection Requirements | Optical Clarity Requirements | Additional Notes |
|---|---|---|---|
| ANSI/ISEA Z87.1 (USA) | Must protect against UV and infrared radiation; impact resistance required | Auto-darkening lenses must meet Optical Class 1 for minimal distortion and maximum clarity | Auto-darkening lenses adjust shade based on arc brightness to reduce eye strain |
| CSA Z94.3 (Canada) | Requires UV radiation protection and impact resistance; electrical protection for certain welding types | Auto-darkening lenses must meet Optical Class 1 to minimize visual distortion | Includes helmet fit and comfort requirements; some helmets have chin straps for security |
I always look for these certifications before I buy a new welding helmet or welding respirator.
Auto-Darkening Technology
How auto-darkening works and its benefits
Auto-darkening technology changed the way I weld. My helmet uses sensors to detect the welding arc. When the arc starts, the lens darkens almost instantly. This protects my eyes from sudden flashes. I do not need to flip the lens up and down, which keeps my hands free and my focus on the work.
- Auto-darkening helmets use arc sensors to detect the welding flash and send this information to an Electronic Control Unit (ECU), which rapidly adjusts the lens shade almost instantaneously.
- This fast reaction time reduces my exposure to harmful light by darkening the lens in a fraction of a second, providing better eye protection than traditional fixed-shade lenses.
- Auto-darkening helmets offer variable shade settings, allowing me to select the appropriate darkness level for my specific welding task, improving visibility and reducing eye strain compared to fixed-shade helmets with a single darkness level.
- When not welding, auto-darkening helmets provide clear visibility, enabling me to see my surroundings without removing the helmet, which enhances overall safety.
- Lens reaction time varies by helmet quality, with higher-end models offering faster darkening, thus more effective eye protection.
- Additional features such as multiple sensors and delay settings further improve safety and usability during welding tasks.
Suitability for different welding processes (MIG, TIG, Stick)
I use different welding processes, such as MIG, TIG, and Stick. Each process produces a unique arc brightness. Auto-darkening helmets let me adjust the shade level for each type. For TIG welding, I need a helmet that responds to low-amperage arcs. For MIG and Stick, I set a higher shade. This adaptability keeps my eyes safe and helps me work more efficiently.
Sensor Technology
Number and placement of sensors for optimal coverage
Sensor technology plays a big role in helmet safety. I prefer helmets with at least three or four sensors. These sensors cover a wide area, so the lens darkens even if my head blocks one sensor. Proper placement ensures the helmet reacts quickly, no matter my position.
Sensor reliability in various environments
I often weld in different environments, from bright shops to dim corners. Reliable sensors make sure my helmet responds to every arc, even in challenging conditions. High-quality sensors prevent accidental flashes and keep my eyes protected at all times.
I always test the sensors before starting a new project to ensure consistent performance.
Summary:
Modern welding helmets and welding respirators offer advanced safety features. I rely on certified lens protection, auto-darkening technology, and reliable sensors to keep my eyes and face safe. These features help me work confidently and efficiently, no matter the welding task.
Case Example: Safety Improvements Over Time
Real-world accident prevention with modern helmets
I remember a time when I worked on a large construction site. One of my colleagues, Tom, started welding without checking his equipment. He wore an older helmet with a fixed shade lens. Suddenly, a bright arc flashed, and he flinched. The lens did not darken fast enough. Tom suffered temporary eye pain, and he had to stop working for the day.
After that incident, I switched to a modern helmet with auto-darkening technology. The sensors reacted instantly to the arc. I noticed that my eyes felt less strained, even after long shifts. I also saw fewer accidents among my team. The new helmets protected us from sudden flashes and flying debris. We could focus on our work without worrying about eye injuries.
Tip: Always test your helmet’s sensors before starting a new project. Reliable sensors can prevent painful accidents.
I have also seen how modern helmets help prevent burns. The improved coverage shields my face and neck from sparks. I feel more confident knowing that my equipment meets current safety standards.
Comparison of old vs. new helmet safety features
When I compare old and new helmets, the differences stand out. I created a table to highlight the main improvements:
| Feature | Old Helmets | Modern Helmets |
|---|---|---|
| Lens Technology | Fixed shade, slow response | Auto-darkening, instant response |
| Sensor Coverage | Few or no sensors | Multiple sensors, wide coverage |
| Comfort and Fit | Heavy, poor adjustability | Lightweight, ergonomic design |
| Impact Protection | Basic, limited materials | High-strength, tested materials |
| Standards Compliance | Rarely certified | Meets ANSI/CSA standards |
I remember how old helmets felt heavy and uncomfortable. The limited adjustability caused headaches and neck pain. Modern helmets use lightweight materials and adjustable headgear. I can wear them for hours without discomfort.
The biggest change comes from auto-darkening lenses. I no longer need to flip the lens up and down. The helmet reacts to the arc instantly, which keeps my eyes safe. Multiple sensors ensure full coverage, even if I move my head.
Note: Modern helmets often include features like grind mode and compatibility with other PPE, such as a welding respirator, for added safety.
Summary:
Modern welding helmets have transformed job site safety. I have seen fewer injuries and more comfortable workdays. The improvements in lens technology, sensor coverage, and comfort make a real difference. I always recommend upgrading to a certified, modern helmet for anyone serious about welding safety.
Comfort and Ergonomics in Welding Helmet Selection
Weight and Balance
Lightweight materials for reduced fatigue
When I select a welding helmet, I always consider its weight. Lightweight materials like polycarbonate and advanced composites make a big difference during long welding sessions. I notice that a lighter helmet reduces neck and shoulder fatigue. This allows me to focus on my welds instead of discomfort. Manufacturers now use materials that provide strength without adding unnecessary weight. I can work longer and maintain better posture when my helmet feels light.
Headgear adjustability for personalized fit
A comfortable fit starts with adjustable headgear. I look for helmets with ratcheting systems and multiple adjustment points. These features let me customize the fit to my head shape. A well-balanced helmet distributes weight evenly, which prevents pressure points and headaches. I often adjust the headgear to keep the helmet stable, even when I move quickly or work in awkward positions. Personalized fit helps me stay productive and safe.
Fit and Adjustability
Customizable headbands and helmet padding
I value helmets with customizable headbands and extra padding. Soft, replaceable pads cushion my forehead and reduce pressure. I can swap out worn pads to keep my helmet feeling fresh. Some models offer wider bands that spread the load, making the helmet more comfortable for extended use. Customization options help me achieve a snug fit, which keeps the helmet from slipping during critical tasks.
Sweatbands and comfort features
Sweatbands are essential for comfort, especially in hot environments. I choose helmets with moisture-wicking sweatbands that absorb perspiration and keep it out of my eyes. Some helmets include antimicrobial treatments to prevent odors. I also appreciate features like quick-release mechanisms and easy-to-clean liners. These small details improve my overall experience and help me stay focused on my work.
Viewing Area and Visibility
Large vs. small viewing windows for different tasks
The size of the viewing window affects how well I can see my work. For precision welding, I prefer a helmet with a large viewing area. This design lets me shift my gaze without moving my body, which helps me maintain stability and control. I find that a larger window reduces neck strain because I can move my eyes instead of my head. In tight spaces or complex positions, this feature becomes even more valuable.
- Larger viewing areas allow me to:
- Maintain a stable body position for cleaner welds.
- Reduce neck strain by relying on eye movement.
- Monitor my surroundings for hazards with a wider peripheral view.
- Track the welding arc and pool more accurately, which leads to higher-quality welds.
- Work more comfortably in overhead or out-of-position tasks.
- Enjoy increased convenience and control, which improves both safety and work quality.
For simple or repetitive tasks, a smaller window may suffice. However, I always weigh the benefits of visibility against helmet weight and cost.
Peripheral vision considerations
Peripheral vision plays a key role in safety. I choose helmets that offer a wide field of view, so I can spot hazards and monitor my environment. Good peripheral vision helps me avoid accidents and stay aware of other workers nearby. I notice that helmets with larger windows and thinner frames provide better side visibility. This feature gives me confidence, especially when I work in busy or confined areas.
Tip: Always try on a welding helmet before buying to check comfort, fit, and visibility. A good fit and clear view can boost both safety and productivity.
Summary:
Comfort and ergonomics matter as much as safety features in a welding helmet. Lightweight materials, adjustable headgear, and thoughtful padding reduce fatigue and improve fit. Large viewing areas and good peripheral vision enhance both precision and safety. I always prioritize these factors to ensure I can work efficiently and comfortably, whether I use a welding helmet or a welding respirator.
Case Example: User Experience with Welding Helmet Comfort
Welder testimonials on comfort and long-term use
I have spoken with many welders over the years, and comfort always comes up in our conversations. When I first started welding, I used a heavy helmet with minimal padding. My neck would ache after just a few hours. I remember adjusting the headgear constantly, trying to find a position that felt right. Many welders I know shared similar stories. They described how uncomfortable helmets made them dread long shifts.
Recently, I tried a helmet with interchangeable headgear and extra padding. The difference felt immediate. I could adjust the fit to match my head shape and hair length. The helmet stayed stable, even when I moved quickly. I noticed less neck strain and fewer headaches. Other welders told me they experienced the same benefits. One colleague said, “I used to take off my helmet every chance I got. Now, I forget I’m even wearing it.”
“A comfortable helmet lets me focus on my welds, not on my discomfort.” — Shop Foreman, 15 years’ experience
User surveys from major manufacturers confirm what I have seen on the job. Welders who use comfortable helmets report higher satisfaction. They wear their helmets longer and make fewer adjustments during work. This leads to better safety and more consistent weld quality.
Impact of comfort on productivity and safety
Comfort does more than just make the day easier. I have found that a well-designed helmet improves my productivity. When I do not need to stop and readjust my gear, I finish tasks faster. I also make fewer mistakes because I can concentrate fully on the weld.
A comfortable helmet encourages me to keep it on at all times, which increases my safety. I have seen welders remove uncomfortable helmets during quick tasks, risking exposure to sparks and UV light. With a helmet that fits well, I stay protected throughout the job.
| Factor | Uncomfortable Helmet | Comfortable Helmet |
|---|---|---|
| Neck Strain | High | Low |
| Frequency of Removal | Frequent | Rare |
| Adjustment Needed | Constant | Minimal |
| Focus on Task | Distracted | Fully Engaged |
| Safety Compliance | Inconsistent | Consistent |
I believe that helmet comfort directly impacts both safety and productivity. When I feel good in my gear, I work better and stay safer. Manufacturers now recognize this, designing helmets that prioritize comfort as much as protection.
Note: Choosing a comfortable welding helmet is not just about luxury—it is a smart investment in your health and job performance.
Summary:
Welder experiences and industry surveys show that helmet comfort matters. Comfortable helmets reduce fatigue, improve focus, and encourage safe work habits. I always recommend trying on several models to find the best fit for long-term use.
Step-by-Step Guide to Choosing a Welding Helmet and Welding Respirator
Assessing Your Welding Needs
Type of welding processes used (MIG, TIG, Stick)
When I start looking for a welding helmet, I always consider the type of welding I plan to do. MIG, TIG, and Stick welding each produce different levels of light intensity and radiation. MIG welding creates a bright arc, so I need a helmet with a higher shade level. TIG welding often uses lower amperage, which means I need a helmet that responds quickly to subtle changes in light. Stick welding produces intense sparks and heat, so I look for helmets with strong impact resistance.
I also think about the materials I work with. Stainless steel, aluminum, and mild steel all reflect light differently. My helmet must protect my eyes from these variations. I check if the helmet suits the welding process I use most often.
- I assess my specific welding applications and environments.
- I consider the types of welding processes and materials I work on.
- I review the working environment, such as indoor or outdoor settings, since lighting conditions affect helmet sensitivity.
Frequency and duration of welding sessions
The length and frequency of my welding sessions influence my choice. If I weld for hours each day, I need a lightweight helmet with adjustable headgear and extra padding. Comfort becomes critical during long shifts. For occasional welding, I might choose a simpler helmet, but I never compromise on safety.
I also factor in my budget. I balance cost against helmet quality, protection, and longevity. I prioritize features like variable shade levels, fast reaction time, and an adequate viewing area. I always check for recognized safety certifications, such as ANSI Z87.1 or EN379.
- I evaluate the duration and frequency of welding tasks.
- I prioritize comfort features to reduce fatigue.
- I factor in budget constraints while balancing cost and helmet quality.
Tip: Always match your helmet to your welding process and session length for maximum safety and comfort.
Summary:
I assess my welding needs by considering the process type, materials, environment, and session duration. This helps me choose a helmet that protects my eyes and keeps me comfortable throughout the job.
Evaluating Lens Type and Shade Range
Fixed vs. variable shade lenses
When I compare lens types, I look at fixed shade and variable shade options. Fixed shade helmets use a single lens darkness, which works well for consistent welding tasks. These helmets are affordable and lightweight. However, I must manually change the lens or remove the helmet to inspect my weld, which exposes my eyes to UV and IR radiation.
Variable shade lenses, found in auto-darkening helmets, adjust automatically to the welding arc. I prefer these for their convenience and versatility. They offer superior optical clarity and continuous protection. I do not need to flip the helmet or change lenses, which increases my productivity.
| Feature/Aspect | Fixed Shade Lenses (Passive Helmets) | Variable Shade Lenses (Auto-Darkening Helmets) |
|---|---|---|
| Shade Adjustment | Fixed shade; manual lens changes required | Variable shade; automatically adjusts to welding arc |
| Safety | Requires helmet removal to inspect weld; exposure to UV/IR | Continuous protection including IR even when not darkened |
| Optical Clarity | Lower optical clarity | Superior optical clarity before and during welding |
| Power Requirement | No power source needed | Battery or solar powered; requires maintenance |
| Cost | More affordable | More expensive; higher maintenance costs |
| Weight | Lightweight | Slightly heavier due to electronics |
| Productivity | Reduced due to manual lens changes and helmet repositioning | Increased due to no need to remove helmet or reposition |
| Versatility | Suitable for consistent, simpler tasks | More versatile for different welding types and intensities |
| Additional Features | None | Sensitivity control, grind mode, adjustable delay settings |
I find variable shade helmets ideal for multiple welding types. They automatically adjust shade, improve safety, and reduce neck strain. Beginners benefit from minimal manual adjustments. Fixed shade helmets remain a good choice for simple, repetitive tasks.
Recommended shades for common welding tasks
I always check the recommended shade levels for my welding process. For MIG and Stick welding, I use shades between 10 and 13. TIG welding often requires shades from 9 to 13, depending on amperage. I select a helmet with a variable shade range to cover all my tasks.
- MIG welding: Shade 10–13
- TIG welding: Shade 9–13
- Stick welding: Shade 10–13
- Grinding: Shade 3–4 (if helmet has grind mode)
Note: I choose a helmet with a wide shade range to ensure protection for every welding process.
Summary:
I evaluate lens type and shade range by comparing fixed and variable options. Variable shade helmets offer more versatility and safety. I select shade levels based on my welding process to protect my eyes and improve my workflow.
Understanding Auto-Darkening Features
Switching speed and sensitivity settings
Auto-darkening helmets have transformed my welding experience. I pay close attention to switching speed, which measures how quickly the lens darkens when the arc starts. Faster switching speeds, measured in milliseconds, protect my eyes from harmful UV light and prevent conditions like arc eye. I look for helmets with speeds between 1/25,000 and 1/10,000 of a second. This is especially important for TIG welding, where the arc can be subtle.
Sensitivity settings allow me to adjust how the helmet responds to light intensity. Higher sensitivity means the lens darkens faster, which helps in bright environments. I always check the lens quality and battery power, as these factors influence performance. Proper adjustment of sensitivity and battery power ensures my helmet responds quickly and keeps me safe.
- Switching speed reduces exposure to harmful light and increases comfort.
- Sensitivity settings improve protection in different lighting conditions.
- Recommended switching speeds range from 1/25,000 to 1/10,000 of a second.
Power source options (battery, solar)
I consider power source options for my auto-darkening helmet. Some helmets use replaceable batteries, while others rely on solar cells. Battery-powered helmets offer consistent performance but require regular maintenance. Solar-powered helmets recharge automatically in bright environments, which reduces downtime.
I check battery life and power source compatibility with my usage patterns. For long sessions, I prefer helmets with both battery and solar options. This ensures my helmet stays powered and responsive throughout the day.
Tip: Always keep spare batteries on hand and check power levels before starting a welding project.
Summary:
I understand auto-darkening features by focusing on switching speed, sensitivity settings, and power sources. Fast switching and proper sensitivity protect my eyes and improve comfort. Reliable power options keep my helmet responsive and safe during every welding session.
Considering Sensors and Controls
Number of sensors for full arc coverage
When I select a welding helmet, I always check the number of arc sensors. More sensors mean better coverage. I prefer helmets with at least three or four sensors. These sensors detect the welding arc from different angles. If I work in tight spaces or change my position, the helmet still responds quickly. This reduces the risk of accidental flashes. I have noticed that helmets with fewer sensors sometimes fail to darken if my hand or head blocks one sensor. Full arc coverage keeps my eyes safe, no matter how I move.
Tip: I always test the helmet’s sensors before starting a new project. Reliable sensors help prevent eye injuries.
Manual vs. automatic controls for ease of use
Controls on a welding helmet can be manual or automatic. I like having both options. Manual controls let me adjust shade, sensitivity, and delay settings. This gives me more control over my protection. I can fine-tune the helmet for different welding processes. Automatic controls, on the other hand, adjust settings based on the environment. These are useful when I switch between tasks quickly. Some helmets even remember my preferred settings. I find that easy-to-use controls save time and reduce mistakes.
- Manual controls: Good for custom settings and specific tasks.
- Automatic controls: Convenient for frequent changes and quick adjustments.
Summary:
I choose helmets with multiple sensors for full arc coverage. I look for user-friendly controls that let me adjust settings easily. This combination keeps me safe and makes my work more efficient.
Comfort and Fit Considerations
Weight and headgear design for extended wear
Helmet weight and headgear design play a big role in my comfort. I have worn heavy helmets in the past, and they caused neck strain after a few hours. Now, I choose lightweight helmets made from modern thermoplastics. These materials reduce fatigue and make long shifts easier. I also look for helmets with balanced weight distribution. A well-balanced helmet feels like an extension of my body. Adjustable headgear with multiple contact points spreads pressure evenly across my head. Padded contact points and good ventilation keep me cool and comfortable. I notice less irritation and heat buildup, even during long welding sessions.
Expert advice from industry leaders confirms my experience. Lightweight, balanced helmets help reduce neck and head fatigue. Manufacturers design helmets to minimize strain and improve comfort. This focus on ergonomics helps me stay productive and safe.
Adjustability for long-term comfort
Adjustability matters just as much as weight. I always pick helmets with headgear that I can fine-tune. Multiple adjustment points let me customize the fit. I can change the tightness, angle, and height to match my head shape. Replaceable padding and sweatbands add extra comfort. When my helmet fits well, I do not need to stop and readjust it. This helps me focus on my work and reduces distractions.
Note: A comfortable, adjustable helmet encourages me to keep it on at all times, which increases my safety.
Summary:
I prioritize lightweight, balanced helmets with adjustable headgear. These features reduce fatigue and improve comfort during long welding sessions. A good fit helps me stay focused and safe.
Additional Features to Look For
Grind mode and multi-functionality
Modern welding helmets often include grind mode and other multi-functional features. Grind mode lets me switch the helmet to a lighter shade for grinding tasks. I do not need to remove the helmet or change equipment. This saves time and keeps my face protected from sparks and debris. Some helmets offer additional modes for cutting or plasma work. Multi-functionality makes my helmet more versatile and valuable in the shop.
Compatibility with welding respirator and other PPE
I always check if my welding helmet works with other personal protective equipment. Compatibility with a welding respirator is important when I work in environments with fumes or dust. Some helmets have extra space or special adapters for respirators. I also look for helmets that fit well with safety glasses, ear protection, and hard hats. This ensures I get full protection without sacrificing comfort or mobility.
| Feature | Benefit |
|---|---|
| Grind Mode | Quick switch for grinding tasks |
| Multi-Functionality | Use for cutting, plasma, and welding |
| Respirator Compatibility | Protects against fumes and airborne hazards |
| PPE Integration | Works with glasses, earplugs, hard hats |
Tip: I always try on my helmet with all my PPE to make sure everything fits and works together.
Summary:
I look for helmets with grind mode and multi-functionality for added convenience. I make sure my helmet is compatible with a welding respirator and other PPE. This approach keeps me safe and ready for any task.
Case Example: Choosing for Specific Applications
MIG vs. TIG vs. Stick welding helmet requirements
When I select a welding helmet for a specific welding process, I always start by evaluating the unique demands of MIG, TIG, and Stick welding. Each process creates different light intensities, arc characteristics, and safety challenges.
For MIG welding, I need a helmet that offers a high shade range. MIG produces a bright, intense arc. I usually set my helmet to a shade level between 10 and 13. Fast auto-darkening response is essential because the arc can start suddenly. I also look for a large viewing area. This helps me track the weld pool and wire feed with precision. MIG often involves spatter, so I prefer helmets with durable, impact-resistant lenses.
TIG welding presents a different challenge. The arc is less intense, especially at low amperages. I require a helmet with a sensitive auto-darkening filter that can detect even weak arcs. Some helmets struggle to darken at low TIG settings, which puts my eyes at risk. I always check for a helmet with a low minimum shade (as low as shade 5 or 6) and high optical clarity. TIG work demands precision, so a clear, distortion-free lens helps me see the weld puddle and electrode tip. Lightweight design matters here because TIG sessions can last for hours.
Stick welding, on the other hand, generates a very bright arc and heavy spatter. I set my helmet to a higher shade, usually 11 to 13. Impact resistance becomes even more important. Stick welding can be rough, so I want a helmet that can withstand knocks and flying slag. I also appreciate a helmet with a grind mode, since I often need to switch between welding and cleaning up the weld.
Here’s a quick comparison table I use when choosing a helmet for each process:
| Welding Process | Recommended Shade | Key Features Needed | My Personal Tips |
|---|---|---|---|
| MIG | 10–13 | Fast auto-darkening, large window | Prioritize spatter resistance |
| TIG | 5–13 | High sensitivity, optical clarity | Look for lightweight, low-min shade |
| Stick | 11–13 | Impact resistance, grind mode | Choose rugged design, easy controls |
Tip: I always test the helmet’s auto-darkening response with each process before starting a big project. This ensures my eyes stay protected and my workflow remains smooth.
Summary:
I match my helmet’s features to the specific welding process. MIG needs high shade and spatter protection. TIG requires sensitivity and clarity. Stick demands ruggedness and high impact resistance.
Professional vs. hobbyist welding helmet selection
My approach to choosing a welding helmet changes depending on whether I weld professionally or as a hobby. As a professional, I spend long hours under the hood. Comfort, durability, and advanced features become non-negotiable. I invest in a helmet with a wide shade range, multiple sensors, and a lightweight, ergonomic design. I also look for features like grind mode, memory settings, and compatibility with other PPE. These features help me stay productive and safe during long shifts.
For hobbyists or occasional welders, priorities shift. I recommend focusing on essential safety features and comfort, but without overspending on advanced technology. A reliable auto-darkening helmet with a basic shade range and good fit usually meets most needs. Hobbyists can often choose a simpler model, as they weld less frequently and for shorter periods. However, I never compromise on safety certifications. Even for occasional use, the helmet must meet ANSI or CSA standards.
Here’s how I compare my choices:
- Professional Welder:
- Invest in premium helmets with advanced features.
- Prioritize comfort for long-term wear.
- Look for high durability and replaceable parts.
- Ensure compatibility with a welding respirator if working in hazardous environments.
- Choose models with customizable settings for different welding tasks.
- Hobbyist Welder:
- Select a helmet with essential safety features.
- Focus on comfort and ease of use.
- Opt for a model with a reliable auto-darkening filter.
- Stick to certified helmets, even at entry-level prices.
- Consider weight and fit, but advanced features may not be necessary.
Note: I always advise new welders to try on several helmets before buying. Comfort and fit can vary widely, and the right choice makes a big difference in both safety and enjoyment.
Summary:
Professionals need helmets with advanced features, comfort, and durability. Hobbyists can choose simpler models but should never sacrifice safety. I always recommend certified helmets for every welder, regardless of experience level.
Comparing Popular Welding Helmet Brands
Overview of Leading Brands
When I look for a new welding helmet, I always start by checking which brands lead the market. Over the years, I have seen certain names come up again and again in shops and online forums. Based on my experience and what I see in the industry, these brands stand out:
- Miller Electric
- Lincoln Electric
- Jackson Safety
- 3M Speedglas
- ESAB
- TrueColor from TynoWeld
I notice that these brands consistently appear in top recommendations. They often run promotions and rebates, which tells me they stay active in the market and care about customer engagement. I trust these brands because they have built strong reputations for quality and innovation.
Miller Electric
Miller Electric helmets impress me with their advanced lens technology and ergonomic designs. I find their True Blue warranty reassuring. Their helmets often feature clear optics and easy-to-use controls, which help me work efficiently.
Lincoln Electric
Lincoln Electric offers a wide range of helmets for both professionals and hobbyists. I appreciate their focus on durability and comfort. Their helmets usually include large viewing areas and reliable auto-darkening filters.
Jackson Safety
Jackson Safety stands out for ruggedness and user comfort. I have used their helmets in tough environments and found them reliable. Their adjustable headgear and lightweight shells make long shifts easier.
3M Speedglas and ESAB
3M Speedglas leads in optical clarity and innovative features. I value their attention to detail, especially in lens quality and headgear comfort. ESAB also delivers high-performance helmets with excellent safety features and modern designs.
TrueColor from TynoWeld
TrueColor is a TradeMark of TynoWeld and since TynoWeld sell their TrueColor welding helmets then TrueColor is famous all over the world since 2015.it offers you truely real view sight and you can see very clear when welding thus improve your work and offer safety. it also offer blue welding arc then reduce your eye strain thus you can work long time safety without eye strain.
I always recommend starting with these brands when searching for a dependable welding helmet.
Feature Comparison
Safety ratings and certifications
Safety comes first for me. I always check for certifications like ANSI Z87.1 and CSA Z94.3. Leading brands make sure their helmets meet or exceed these standards. I see that Miller Electric, Lincoln Electric, TynoWeld all comply with recognized safety norms. Their helmets often feature optical clarity ratings such as 1/1/1/1 or 1/1/1/2, which means I get clear vision and reliable protection. Fast auto-darkening response, multiple arc sensors, and adjustable controls are standard features. These brands also emphasize compliance with OSHA and European safety norms, which gives me extra peace of mind.
Price vs. performance analysis
When I compare price and performance, I notice that premium brands like 3M Speedglas and Miller Electric cost more, but they deliver advanced features and long-term durability. Lincoln Electric and Jackson Safety offer strong performance at a slightly lower price point, making them great choices for budget-conscious welders. ESAB provides a balance between innovation and affordability. I always weigh the cost against the features I need, such as lens clarity, comfort, and adjustability.
| Brand | Safety Certifications | Optical Clarity | Price Range | Notable Features |
|---|---|---|---|---|
| Miller Electric | ANSI, CSA | 1/1/1/2 | Mid to High | TrueColor lens, ergonomic fit |
| Lincoln Electric | ANSI, CSA | 1/1/1/1 | Mid | Large viewing area, durability |
| Jackson Safety | ANSI, CSA | 1/1/1/1 | Low to Mid | Lightweight, rugged design |
| 3M Speedglas | ANSI, EN, CSA | 1/1/1/2 | High | Advanced optics, comfort |
| TynoWeld TrueColor | ANSI, EN,CSA,AS/NZS | 1/1/1/1 &1/1/1/2 | Low | Innovative TrueColor features, style |
I always match my budget to my needs, but I never compromise on safety certifications.
Case Example: Brand Selection Stories
User reviews and feedback on top brands
I often read user reviews before making a purchase. Many welders praise Miller Electric for its comfort and lens clarity. Lincoln Electric receives high marks for reliability and ease of use. Jackson Safety helmets get positive feedback for their lightweight feel and rugged construction. 3M Speedglas stands out in reviews for optical clarity and advanced features, though some users mention the higher price. ESAB earns respect for innovation and stylish designs.
Brand loyalty and reputation in the welding community
Brand loyalty runs deep in the welding community. I have met welders who stick with one brand for decades because of consistent quality and support. Miller Electric and Lincoln Electric have strong followings, while 3M Speedglas attracts those who want the latest technology. Jackson Safety appeals to welders who value comfort and durability. ESAB continues to grow its reputation with innovative products.
In my experience, choosing a trusted brand leads to better performance and fewer headaches down the road.
Summary:
I rely on leading brands like Miller Electric, Lincoln Electric, Jackson Safety, 3M Speedglas, and TynoWeld TrueColor for quality and safety. These brands offer certified protection, advanced features, and strong reputations. User feedback and community loyalty confirm their value. I always recommend starting with these names when selecting a welding helmet.
Maintenance and Care for Welding Helmet and Welding Respirator
Cleaning and Storage Tips
Lens cleaning methods for clarity and longevity
I always keep my welding helmet lens clean to maintain clear vision and extend its life. I use a microfiber cloth to gently wipe the lens after each use. This prevents scratches and keeps the surface free from dust. For stubborn grime, I apply a specialized lens cleaning solution or mild soap with water. I avoid harsh chemicals and never spray cleaner directly onto the lens. Instead, I dampen the cloth first. When dust collects in crevices, I use a soft-bristled brush to remove it without damaging the surface. I disinfect the interior headbands and padding with a compatible spray to prevent germs. Handling the helmet with clean hands helps prevent smudges and oil buildup.
Tip: Wipe your helmet with a soft, dry cloth after every session to prevent dirt from accumulating.
Proper helmet and respirator storage
Proper storage keeps my welding helmet and welding respirator in top condition. I never leave my helmet in direct sunlight or extreme temperatures, as this can damage sensors and electronics. I store my helmet on a wall-mounted rack by the headband, which prevents deformation and makes it easy to grab when I need it. For transport, I use a helmet bag to protect against scratches, impacts, and sunlight. I keep my storage area dry and sometimes use a dehumidifier to avoid moisture damage. I always remove the batteries if I plan to store the helmet for a long time. This prevents corrosion and battery drain. I keep helmets away from chemicals and corrosive substances that could degrade the materials.
Replacing Parts and Accessories
Lens replacement procedures
I replace my helmet lens as soon as I notice deep scratches, cracks, or reduced clarity. I follow the manufacturer’s instructions for removing and installing new lenses. Most helmets have a simple snap-in or slide-out mechanism. I always use genuine replacement parts to ensure proper fit and safety. Regular lens replacement keeps my vision sharp and protects my eyes from harmful rays.
Headgear, padding, and respirator updates
Headgear and padding wear out over time, especially with daily use. I check these parts regularly for signs of wear or loss of comfort. When I notice fraying, loss of cushioning, or loose fit, I replace the headgear or padding. For my welding respirator, I inspect the filters and straps. I update them as needed to maintain a secure and comfortable fit. The table below shows how often I replace key parts based on usage:
| Usage Type | Recommended Replacement Frequency | Notes |
|---|---|---|
| Heavy Use | Every 2 years | For professional daily welding use |
| Moderate Use | Every 3-5 years | For occasional professional or intensive hobbyist use |
| Light Use | Every 5-7 years | For infrequent use such as small home projects or sporadic repairs |
| After Impact or Damage | Immediately | Replace immediately if any visible cracks, deep scratches, or damage |
| Manufacturer Recommendations | As recommended | Follow specific manufacturer guidelines for lens and headgear |
Extending Helmet Lifespan
Regular inspection routines for safety
I make it a habit to inspect my welding helmet before every use. I check for cracks, dents, or worn parts. I look closely at the lens, headgear, and shell. If I find any damage, I replace the affected part right away. Routine inspections help me catch small issues before they become big problems.
Preventing common damage and wear
To prevent damage, I always handle my helmet with care. I avoid dropping it or placing heavy objects on top. I store it in a cool, dry place and keep it away from chemicals. I use anti-static sprays in dry environments to reduce dust buildup. By following these steps, I extend the life of my helmet and keep it performing at its best.
Note: Regular cleaning, careful storage, and timely replacement of parts ensure my welding helmet and welding respirator stay safe and reliable for years.
Summary:
Proper maintenance of my welding helmet and welding respirator keeps me safe and extends the life of my equipment. I clean lenses gently, store my gear correctly, replace worn parts on schedule, and inspect everything before each use. These habits protect my investment and help me work with confidence.
Case Example: Maintenance Success Stories
Long-term helmet durability with proper care
I have always believed that proper care extends the life of my welding helmet. Years ago, I purchased a high-quality helmet for daily use in my fabrication shop. I made a habit of cleaning the lens after every shift. I stored the helmet on a dedicated rack, away from direct sunlight and moisture. I checked the headgear and padding every month. When I noticed wear, I replaced the parts immediately.
One winter, I dropped my helmet on a concrete floor. The shell remained intact because I had inspected it regularly and replaced the padding just a week before. I realized that routine maintenance prevented minor accidents from turning into costly replacements. My helmet lasted over six years, even with heavy use. I saw other welders replace their helmets every two years because they ignored basic care.
I recommend these steps for long-term durability:
- Clean the lens with a microfiber cloth after each use.
- Store the helmet in a cool, dry place.
- Inspect headgear and padding monthly.
- Replace worn parts promptly.
- Avoid exposing the helmet to chemicals or extreme temperatures.
Regular care protects your investment and ensures reliable safety on the job.
Cost savings through regular maintenance
I track my expenses closely. When I started maintaining my helmet, I noticed a significant drop in replacement costs. I used to buy a new helmet every few years. After I adopted a maintenance routine, I only needed to replace minor parts like sweatbands and lenses. The savings added up quickly.If choose Tynoweld Truecolor will save a lot each year.
I created a simple table to compare costs:
| Item Replaced | Cost per Year (No Maintenance) | Cost per Year (With Maintenance) |
|---|---|---|
| Full Helmet | $100 | $0 |
| Lens | $30 | $30 |
| Headgear/Padding | $25 | $25 |
| Sweatbands | $10 | $10 |
| Total | $165 | $65 |
I saved over $100 each year by maintaining my helmet. I invested the savings in better tools and safety gear. My productivity increased because I spent less time dealing with equipment failures. I shared my routine with my team, and everyone saw similar results.
Tip: Small investments in maintenance lead to big savings and safer work environments.
Summary:
Proper maintenance extends the life of my welding helmet and reduces costs. I clean, inspect, and replace parts regularly. These habits protect my equipment and improve my safety. I encourage every welder to follow a maintenance routine for long-term benefits.
Common Mistakes to Avoid When Choosing a Welding Helmet
Overlooking Safety Certifications
Importance of ANSI and CSA standards
When I choose a welding helmet, I always check for safety certifications like ANSI Z87.1 or CSA Z94.3. These standards guarantee that my helmet will protect me from flying debris, UV rays, and intense light. I have learned that helmets without these certifications may not offer reliable protection. I trust helmets that meet these standards because they undergo rigorous testing for impact resistance and optical clarity.
Safety certifications are not just labels—they are proof that my equipment can handle real-world hazards.
Risks of uncertified helmets
I have seen welders use uncertified helmets to save money. This decision often leads to serious risks. Uncertified helmets may crack under impact or fail to block harmful rays. I remember a coworker who suffered eye pain after using a cheap helmet that did not meet standards. He had to stop working for several days. I avoid these risks by always verifying certifications before I buy.
Ignoring Comfort and Fit
Consequences of poor ergonomics
Comfort matters as much as safety. I once wore a heavy helmet with poor padding. After a few hours, my neck felt sore and my focus slipped. Poor ergonomics can cause neck fatigue, headaches, and even repetitive stress injuries. If my helmet does not fit well, I spend more time adjusting it than welding. This distraction can lead to mistakes and accidents.
Productivity and safety impact
A comfortable welding helmet helps me stay productive and safe. When my helmet fits well, I keep it on throughout the job. I do not risk exposure by removing it for quick tasks. I finish my work faster and make fewer errors. I always try on helmets before buying to find the best fit for my head shape and work style.
| Comfort Factor | Poor Fit Impact | Good Fit Benefit |
|---|---|---|
| Neck Fatigue | High | Low |
| Focus | Distracted | Engaged |
| Safety Compliance | Inconsistent | Consistent |
Focusing Only on Price
Value vs. cost considerations for long-term use
I understand the temptation to buy the cheapest helmet available. However, I have learned that low-cost helmets often lack essential features. They may not have auto-darkening lenses, fast reaction times, or multiple sensors. These missing features can compromise my safety and comfort. I consider the value of a helmet over its initial cost. Investing in a quality helmet saves me money in the long run because I avoid injuries and replacement expenses.
Long-term investment benefits of quality helmets
Quality helmets last longer and perform better. I have used premium helmets for years without major issues. They offer reliable protection, comfort, and compatibility with other PPE like a welding respirator. I spend less on repairs and replacements. My productivity increases because I do not worry about equipment failures. I always recommend choosing a reputable brand with good customer support.
Investing in a high-quality welding helmet is a smart decision for both safety and long-term savings.
Summary:
I avoid common mistakes by checking safety certifications, prioritizing comfort and fit, and considering long-term value over price. These steps help me choose a welding helmet that protects me, keeps me comfortable, and supports my productivity.
Case Example: Mistake and Solution
Real-world buying regrets and lessons learned
I remember the first time I bought a welding helmet on my own. I wanted to save money, so I picked the cheapest model I could find online. The product description looked good, but I did not check for safety certifications or user reviews. The helmet arrived quickly, and I started using it right away.
After a few days, I noticed the lens did not darken fast enough. My eyes felt sore after every session. The headgear pinched my forehead, and the helmet kept slipping out of place. I tried to adjust it, but nothing worked. One day, the lens failed completely during a weld. I had to stop working and visit an eye doctor because of the pain. I realized my mistake cost me more than just money—it put my health at risk.
From this experience, I learned several important lessons:
- Never ignore safety certifications like ANSI or CSA.
- Comfort and fit matter as much as price.
- User reviews can reveal hidden problems.
- Cheap equipment often leads to higher costs in the long run.
My regret taught me to value quality and safety over saving a few dollars.
How to avoid common pitfalls in helmet selection
Now, I follow a clear process when choosing a welding helmet. I want to help others avoid the mistakes I made. Here are the steps I use:
- Check for Certifications: I always look for ANSI or CSA marks on the helmet. These prove the helmet meets safety standards.
- Try Before Buying: I visit local stores to try on different models. I check the fit, weight, and comfort.
- Read User Reviews: I read feedback from other welders. Honest reviews highlight both strengths and weaknesses.
- Test the Features: I test the auto-darkening lens and controls. I make sure the helmet responds quickly and works with my preferred welding processes.
- Consider Long-term Value: I compare the cost of replacement parts and the warranty. I choose a helmet that will last and protect me for years.
| Step | Why It Matters |
|---|---|
| Check Certifications | Ensures real protection |
| Try Before Buying | Confirms comfort and fit |
| Read Reviews | Reveals real-world performance |
| Test Features | Prevents surprises on the job |
| Consider Value | Saves money and trouble over time |
Tip: I always bring my welding respirator when trying on helmets to check for compatibility.
Summary:
My early mistake taught me to never compromise on safety or comfort. By following a careful selection process, I now avoid regrets and work with confidence. I encourage every welder to learn from my experience and make informed choices.
I know that choosing the right welding helmet or welding respirator keeps me safe and productive. Decades of progress—from early goggles to advanced auto-darkening filters—give me better protection and comfort. I always research new models, try on different helmets, and ask experts for advice. For more details, I check product reviews and safety guides from trusted industry sources. My careful approach ensures I select gear that meets my needs and keeps me protected.
FAQ
What shade level do I need for MIG, TIG, and Stick welding?
I select shade 10–13 for MIG and Stick welding. For TIG, I use shade 9–13, depending on amperage. I always check the helmet’s variable shade range to match my welding process.
How often should I replace my welding helmet lens?
I replace my lens when I see scratches, cracks, or reduced clarity. For daily use, I check the lens weekly. I follow the manufacturer’s guidelines for replacement intervals to ensure maximum eye protection.
Can I wear glasses or a respirator under my welding helmet?
Yes, I can wear safety glasses and a welding respirator under most modern helmets. I always try on the helmet with my PPE to confirm a comfortable fit and full protection.
What is the difference between auto-darkening and passive welding helmets?
Auto-darkening helmets adjust the lens shade automatically when I strike an arc. Passive helmets use a fixed shade lens. I prefer auto-darkening for convenience and continuous protection during welding.
How do I know if my helmet meets safety standards?
I check for ANSI Z87.1 or CSA Z94.3 certification marks on the helmet. I also review the product manual and manufacturer’s website for compliance information. Certified helmets give me confidence in their protection.
How do I clean and maintain my welding helmet?
I use a microfiber cloth and mild soap to clean the lens. I store my helmet in a cool, dry place. I inspect headgear and padding regularly and replace worn parts as needed.
What features should I prioritize for long welding sessions?
I look for lightweight materials, adjustable headgear, and a large viewing area. Comfort features like sweatbands and extra padding help me stay focused and reduce fatigue during long shifts.
In summary, I choose my welding helmet based on safety, comfort, and compatibility with my equipment. Regular maintenance and proper fit keep me safe and productive every day.
Post time: Aug-15-2025